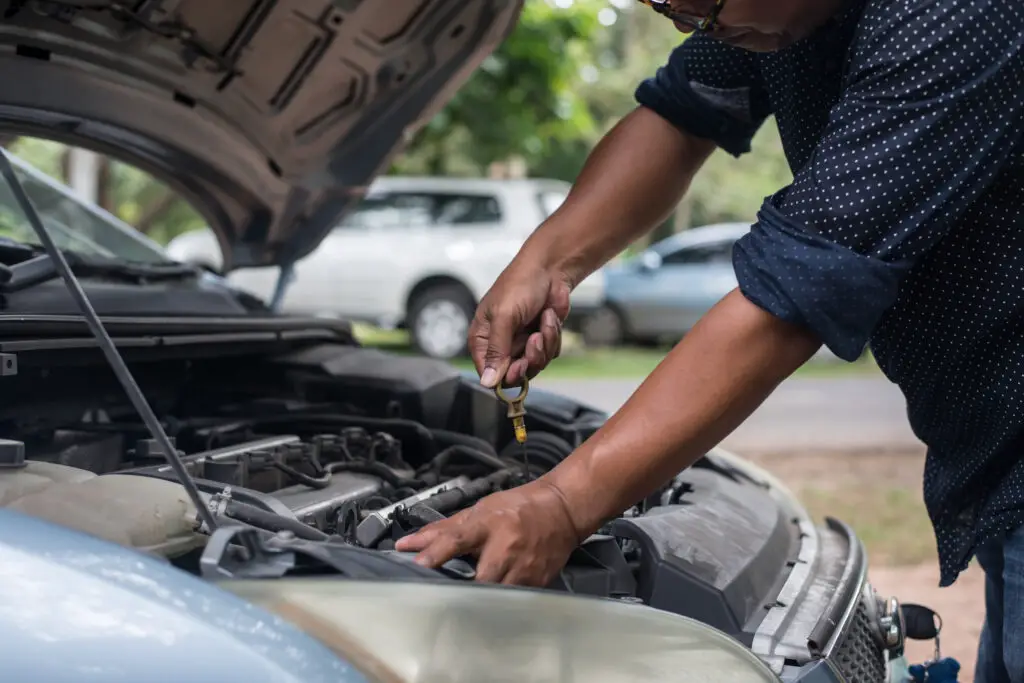
Do you check oil with car on or off? Maintaining your car is essential to ensure its longevity and performance, and one of the most fundamental aspects of car maintenance is checking the engine oil. However, a common question that arises is whether to check the engine oil with the car on or off.
This blog post will explore the intricacies of this topic, providing detailed guidance on how to accurately check your engine oil and why it matters.
Why Checking Engine Oil is Important
Engine oil serves several critical functions within your vehicle:
- Lubrication: It reduces friction between the moving parts of the engine, preventing wear and tear.
- Cooling: It helps dissipate heat generated by the engine, preventing overheating.
- Cleaning: It carries away dirt, debris, and microscopic metal particles that accumulate within the engine.
- Sealing: It helps seal gaps between the pistons, rings, and cylinder walls to improve engine efficiency.
- Corrosion Protection: It contains additives that prevent rust and corrosion.
Given these essential functions, maintaining the correct oil level and quality is crucial for your engine’s health and performance.
Should You Check Engine Oil with the Car On or Off?
The correct procedure is to check your engine oil with the car off. Here’s why:
- Safety: Checking the oil with the engine running can be dangerous due to moving parts and high temperatures.
- Accuracy: When the engine is off, the oil settles in the oil pan, providing an accurate reading. If the engine is running, the oil circulates throughout the engine, leading to an incorrect measurement.
Detailed Steps to Check Engine Oil
1. Park on a Level Surface
Parking on a flat, level surface is crucial for an accurate oil reading. If your car is on an incline, the oil will pool to one side of the oil pan, leading to an incorrect measurement. Take the time to find a flat area, such as a driveway or a parking lot, to ensure your reading reflects the true oil level.
2. Turn Off the Engine
Turn off the engine and wait for at least 5-10 minutes to allow the oil to settle back into the oil pan. This waiting period ensures that the oil is not circulating and is not splashed around the engine, which could lead to an inaccurate reading.
3. Locate the Dipstick
Open the hood and find the dipstick, which is usually brightly colored (yellow or orange) and labeled “Engine Oil.” The location can vary depending on the make and model of your car, so refer to your owner’s manual if you have trouble finding it. The dipstick is typically found near the front of the engine or towards the side, attached to the engine block.
4. Remove the Dipstick
Carefully pull out the dipstick and wipe it clean with a lint-free rag or paper towel. This step is essential because the initial pull might show oil splashed on the dipstick during engine operation, which doesn’t give an accurate reading of the oil level.
5. Reinsert the Dipstick
Insert the dipstick back into its tube all the way down, then pull it out again. This action allows the dipstick to capture a true sample of the oil level in the pan. Ensure you push the dipstick all the way in until it stops before pulling it out again to check the level.
6. Check the Oil Level
Hold the dipstick horizontally to prevent the oil from running up or down the stick. Most dipsticks have two marks or a cross-hatched area indicating the minimum and maximum oil levels. The oil should ideally be between these two marks. If it’s below the minimum mark, it’s time to add oil.
- Minimum Mark: Indicates the lowest safe oil level.
- Maximum Mark: Indicates the highest safe oil level.
If the oil is at or below the minimum mark, you should add oil immediately to avoid engine damage.
7. Check the Oil Condition
The oil’s color and texture are as important as the level. Fresh oil is typically amber and clear. Used oil turns darker as it collects impurities from the engine. If the oil appears black, gritty, or milky:
- Black Oil: Indicates it’s time for an oil change.
- Gritty Oil: Suggests the presence of dirt or metal particles, which could mean the oil filter needs to be replaced.
- Milky Oil: Often signals coolant contamination, which could indicate a serious issue such as a blown head gasket.
8. Add Oil if Necessary
If the oil level is low, add oil according to the specifications in your owner’s manual. Use a funnel to avoid spills and pour slowly. Recheck the level with the dipstick after adding to ensure you don’t overfill. Adding oil in small increments and checking frequently helps maintain the correct level.
- Type of Oil: Make sure you’re using the correct type of oil for your engine. Refer to the owner’s manual for the recommended oil viscosity and type (e.g., synthetic or conventional).
- Quantity: Add the oil in small amounts, usually half a quart at a time, to avoid overfilling.
9. Reinsert the Dipstick
After ensuring the oil level is correct, securely reinsert the dipstick back into its tube. Double-check that it’s fully seated. This step is essential for preventing dirt or contaminants from entering the oil system. Finally, close the hood securely to complete the process.
Importance of Checking Engine Oil Regularly
Regularly checking your engine oil ensures that your car operates smoothly and prevents major engine issues. An adequate oil level keeps the engine lubricated, reducing friction and wear on moving parts, and helps maintain optimal engine performance. Neglecting oil checks can lead to severe engine damage and costly repairs.
Additional Maintenance Tips
In addition to checking your engine oil, adhere to a regular maintenance schedule:
- Regular Oil Changes: Follow the manufacturer’s recommendations for oil change intervals.
- Replace Oil Filters: Change the oil filter with each oil change to maintain oil quality.
- Monitor Oil Pressure: Pay attention to the oil pressure gauge or warning light on your dashboard.
- Use Quality Oil: Use high-quality oil that meets or exceeds the specifications in your owner’s manual.
By following these detailed steps and maintaining regular oil checks, you can ensure your vehicle runs efficiently and avoid costly repairs down the road. Regular oil maintenance is a small investment of time that yields significant benefits for your vehicle’s performance and longevity.
Why Checking Engine Oil is Crucial
Preventing Engine Damage
Low or dirty oil can lead to insufficient lubrication, causing increased friction and heat. This can result in severe engine damage, including warped components and complete engine failure.
Maintaining Performance
Proper oil levels and clean oil ensure that your engine runs smoothly, providing optimal performance and fuel efficiency. Neglecting oil checks can lead to decreased performance and increased fuel consumption.
Extending Engine Lifespan
Regularly checking and maintaining your engine oil can significantly extend the lifespan of your engine. Clean and adequate oil reduces wear and tear on engine components, preventing costly repairs and replacements.
Common Mistakes to Avoid
Checking Oil on a Hot Engine
While it’s essential to let the engine warm up before an oil change, checking the oil level on a hot engine can be dangerous and inaccurate. Always wait a few minutes after turning off the engine.
Overfilling with Oil
Overfilling can be as harmful as having too little oil. Excess oil can foam and lead to poor lubrication and increased engine wear. Always add oil slowly and check the level frequently.
Using the Wrong Oil
Using the wrong type or grade of oil can affect engine performance and longevity. Always refer to your owner’s manual for the correct oil specification for your vehicle.
Troubleshooting Common Oil Issues
Low Oil Level
If you notice that your oil level is consistently low, it could indicate a leak or that your engine is burning oil. Common signs of oil leaks include oil spots under your car or a burning oil smell. Check for leaks around the oil pan, valve covers, and oil filter. If you suspect your engine is burning oil, look for blue smoke from the exhaust.
Dirty Oil
Dirty or gritty oil can indicate that the oil is past its prime or that your engine is running in a dirty environment. If your oil looks dirty soon after an oil change, it might be a sign of internal engine issues or that the oil filter needs to be replaced.
Milky Oil
Milky or frothy oil can indicate coolant contamination, often caused by a blown head gasket, a cracked engine block, or a damaged cylinder head. If you notice milky oil, have your vehicle inspected by a professional mechanic immediately.
When to Seek Professional Help
While checking and maintaining your engine oil is a task most drivers can handle, certain situations require professional assistance:
- Persistent Low Oil Levels: If your oil level continues to drop quickly after refilling, there may be a significant leak or internal engine issue.
- Milky Oil: This often indicates a severe problem that requires immediate attention.
- Unusual Noises or Performance Issues: If your engine is making unusual noises or you notice a drop in performance, it could be related to oil problems or other mechanical issues.
Regular Maintenance Tips
In addition to regularly checking your engine oil, it’s important to adhere to a maintenance schedule for other essential tasks. Here are a few tips:
Oil Changes
Follow your vehicle manufacturer’s recommendations for oil change intervals. Regular oil changes are crucial for maintaining oil quality and engine health.
Oil Filters
Replace the oil filter with every oil change. A clean oil filter ensures that contaminants are removed from the oil, preventing them from circulating through the engine.
Use High-Quality Oil
Use high-quality oil that meets or exceeds the specifications outlined in your owner’s manual. Synthetic oils, while more expensive, offer superior performance and protection.
Keep an Eye on Oil Pressure
Pay attention to your vehicle’s oil pressure gauge or warning light. Low oil pressure can indicate an oil pump issue or low oil levels, both of which require immediate attention.
Conclusion
Checking your engine oil with the car off is a simple yet crucial task for maintaining your vehicle’s health and performance. Regular oil checks can prevent costly repairs, extend the lifespan of your engine, and ensure a smooth and safe driving experience. By understanding the importance of oil maintenance and recognizing common issues, you can take proactive steps to keep your vehicle running efficiently.
Always refer to your owner’s manual for specific guidelines and consider consulting a professional mechanic for any concerns beyond basic maintenance. Regular maintenance checks, including oil changes and inspections, are essential for a reliable and efficient vehicle.
Chinedu Chikwem holds a National Diploma in Motor Vehicle Mechatronics from the Institute of Management and Technology (IMT), Enugu, in partnership with Anambra Motor Manufacturing Co. Ltd. Passionate about the automotive industry, he specializes in simplifying complex vehicle concepts and making both traditional and electric vehicle terminology accessible. With a solid foundation in automotive engineering, Chikwem is focused on becoming a leading electric vehicle manufacturer, driving innovation and shaping the future of mobility both across Africa and globally.
Discover more from Chikwem
Subscribe to get the latest posts sent to your email.